Further I will export model in 5 Max through Export in a format 3ds. We import a file to 5th Max with here such options:
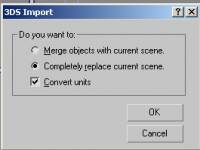
After import, it is necessary to check up the sizes, happens, that for not clear reasons, even having exposed identical options in units of measure, the model is imported with infringement of the sizes (at me and has happened).
The model is displayed in a grey kind, it is necessary rewrite for a way to textures. We cause menu Material Editor (M), Further by a pipette it is cluck on our object. Textures should appear. We will check up a way to them in roll Map. It should correspond to an arrangement of our texture on the winchester. It is necessary to make it, differently at export in Trainz names of textures can fly.
As I already spoke earlier, our gate will be configured as moving. I.e. they will react to train approach, opening, instead of being closed as it does moving. Therefore we will have a return order of animation. Not looking that by default gate will be closed, in a zero shot of animation we should show gate in an open condition. Therefore last stroke of modelling, installation of shutters in position it will be "open".
Let's turn both shutters on 90 degrees. We use for this purpose Select and rotate with pressed terminator Angle snap toggle which will carry out rotation with step to 5 degrees.
Further we will shift shutters of gate to the place of their disposition, remembering, that loops, i.e. axes of rotation of shutters, are located somewhere on a joint of an external corner of the shutter adjoining to a rack.
In an ideal, it was necessary to instal at once an axis of rotation of shutters in this corner through menu Hierarchy - Affect pivot only, moving an axis on a joint of an external corner of a shutter and a rack.
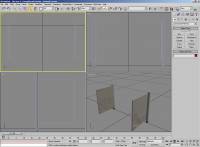
In any case here so gate before animation should look:
Yes, nearly has not forgotten, that rails connected to ours to collars, be required to us two points of a binding which rails will join, and between these points there will be the fixed way having a texture connected to it of ways. According to the point specification should be called as pair names: a.track0a - a.track0b for one way (our case), a.track1a - a.track1b for the second way (in a case with two ways) etc. do not break the given scheme calling, otherwise, at more than one way rails can connected and a cross crosswise and along gate.
All auxiliary elements, whether it be Dummy or Point, should be added to model only through the top view (top), this rule is obligatory to performance. If though one Dummy is created in a kind distinct from from above (top), glitches of 100 % to you will be provided.
We put our Point (menu Create - Helpers) on an axis of our gate, the first before it, the second after, approximately on identical distance and with distance between them, suppose, in 2 metres. It not essentially, it is possible to do 5 and 10 and 100 metres. Here high accuracy is not obligatory. In the nature there is nothing ideal. Basically, it is possible to put one Point, the second it is simple to clone, moving it only on one axis. Do not forget about names of auxiliary objects, they should correspond necessarily to the specification from Auran. It is possible to name other objects how it is pleasant to you. A rail, it is possible to do a stage of arrangement of Point bindings and in the end, here there are no basic conditions as the given auxiliary elements can not link to central Dummy.
We pass to animation. All animation in Trainz is based on Dummy. These are auxiliary elements - baby's dummies which are not displayed in any way, but link with objects and them we and will be animate.
Rules of arrangement for Dummy (menu Create - Dummy) same, as well as for Point - i.e. only through the top view. We put main Dummy on a mark 0,0,0. It too an obligatory condition. The size Dummy has no value. The basic Dummy should carry a name either b.r.main, or b.r.base and in any way differently. It is parental object on which there will be link further all our elements. The basic Dummy is better be not to touching further.
Now our model should look as follows:
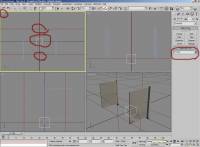
Now we will create Dummy for each shutter. For this purpose it is possible simply clone the basic Dummy. We will rename turned out Dummy in b.r.stvorka and b.r.stvorka1. Can use other any names, but it is obligatory with presence of letters - b.r. In the beginning.
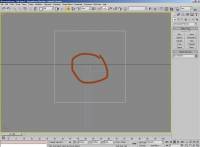
Dummy shutters it is necessary to place so that their centre has coincided with that loop of a shutter, i.e. the external corner adjoining to a rack.
Here so:
Before link give centre axes of rotation of shutters with corresponding Dummy. For this purpose we activate a mouse a shutter, in the right menu we pass to bookmark Hierarchy, section Pivot, we press Affect Pivot Only, further Alt+A or Allign, the cursor kind varies on two rectangles, further we press on border corresponding Dummy. In the appeared window we put ticks in such here an order:
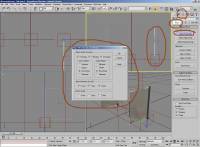
We press OK. It is made the same with the second shutter.
Everything, remains only link all and to start animation. Link under the following scheme: shutters to corresponding Dummy (b.r.stvorka (1)), Dummy shutters link with central b.r.base, racks also link to central Dummy. Binding points it is possible not link. Link it is necessary, having allocated dependent object, further basically the menu we press on button Select and Link, we direct the cursor at our object, it takes the form of two squares, further we press the left button of the mouse and, not releasing it, we direct the cursor at parental object with which we want link ours.
Remember, we link objects to Dummy, rather the reverse. Dummy can link only with seniors Dummy. All should be link and as a result to become isolated on core Dummy. The result of a link can be looked in menu Select by Name, having activated tick Display Subtree.
It should turn out here so:
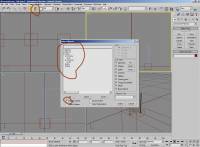
It is possible to start animation. To begin with we will instal length of animation 30 shots, it will be enough for gate. For animation answers the menu, being below, under projection kinds. We press Time Configuration (a button with a watch). In the opened window in section Animation we change figure in the field End Time on 30. We press Re-Scale Time. Further two times OK.
The animation ruler (below) should become length 30 shots. We are convinced, that key shots costs on 0. We press button Set Key (below), the ruler is painted in red colour. In this mode it is click at first on one Dummy shutters, then with pressed key CTRL on the second, allocating them together. Further we press on the button with the key image. On a ruler on a zero shot where now is key animations, there is a key label. So we activated the first key of animation in a shot 0 for both our shutters.
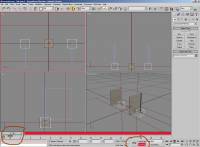
We move key animations to extreme position on 30 shot. We choose on the basic menu manipulation Select and Rotate. We allocate one of ours Dummy and it is rotated it in position a shutter it is closed, i.e. it is equal on 90 degrees. Be convinced, that at you function (button) Angle snap Toggle as in this case rotation will happen to step exactly in 5 degrees is activated. We make the same actions with Dummy the second shutter.
It is ready. It is necessary to keep an initial file and to make export to format Trainz. Before export, be convinced, that any object or Dummy is not allocated. We choose in the menu export format Trainz, at first we export model with expansion .im, set any any name, without expansion instructions. Further we make the same operation, but we export an animation file, I use defolt a file name anim.kin, but it not essentially, at export of a file of animation it is necessary to add necessarily besides a file name and expansion .kin differently you again will make export in .im format.
I do not use regular function СМР on creation config a file as I find it enough difficult in understanding. Therefore simply find config a file of any single-line train and copy it in your folder, having changed all necessary data in it (a name of files, the name, Kuid, the author etc.). In СМР create new object with any type, I use Scenery, open a folder for editing in Explorer, replace config.txt on in advance prepared, register in it number Kuid and copy files of our gate in this folder. Make commit (Ctrl+m). I use here such config.txt:
kuid <kuid:370528:1270>
category-class "TR"
description "Lessonvorota"
region "Kazhakhstan"
type "Scenery"
light 1
mesh-table {
default {
mesh "Lessonvorota.im"
anim "anim.kin"
auto-create 1
}
}
kind "mocrossing"
attached-track {
track_one {
track <kuid:-1:15>
useadjoiningtracktype 1
vertices {
0 "a.track0a"
1 "a.track0b"
}
}
}
obsolete-table {
}
trainz-build 1.3
category-region-0 "KZ"
category-era-0 1970
category-era-1 1980
category-era-2 1990
category-era-3 2000
category-era-4 2010
asset-filename "Lessonvorota"
username "n_Lessonvorota"
author "Neoklai"
kuid-table {
0 <kuid:-1:15>
}
contact-email "zubec75@mail.ru"
contact-website "www.neoklai.ucoz.ru" In case of any error in texture of files or in config.txt opposite to your model in CMP the red exclamation mark will light up. In this case choose through the menu function View Error and look in what business. In our case in a folder with object there should be 5 files:
1. A texture file
2. A text file of a texture
3. Object with expansion.im
4. A file of animation with anim.kin
5. A file config.txt
Load game and look result. For practice, on the basis of the given lesson, try to make gate with opening different ways, for example, one-folding, rolled away aside, upwards (it is possible to use for depot), for two ways etc.
To download an initial file in Max and a texture it is possible here:http://neoklai.ucoz.ru/Lesson1.rar
|